Having been cleansed through cleaning and learned through study, my kingdom of a press was without an army. A mighty force it appeared, but with no energy coursing through its muscles of steel, it proved to be nothing more than a farce. What is a press without a motor if it is not a kingdom without an army or a man without a heart? The winds have changed and now the sweet fruit that my lettepress bares I have tasted.
I often love a dramatic opening.
After a few weeks breathing in the bitter fumes of turpentine and going through reams of sandpaper, my Heidelberg Windmill letterpress finally got the heart transplant it sorely needed—a new motor was installed. Going from the industrial setting it use to be in to our garage was something I’ve written about before. I mentioned previously that the power requirements weren’t something we were able to provided in our house, so a new motor which we could handle had to be ordered. A birthday passed and I was lucky enough to receive a new motor as a present from my wife’s family.
What follows is a series of photos showing what was done to pull out the old motor and replace it with a shiny new one. A few roadblocks were hit along the way, but nothing that couldn’t be fixed.
Motor
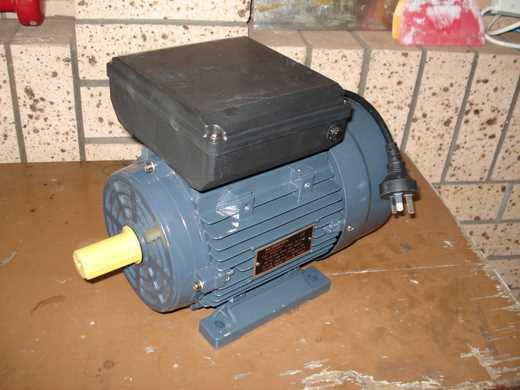
The new motor, right out of the box awaiting to be installed, heavier than one might think.
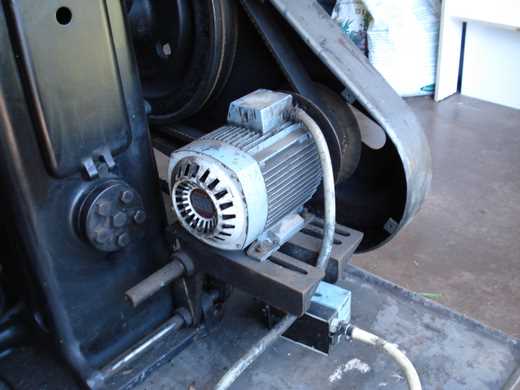
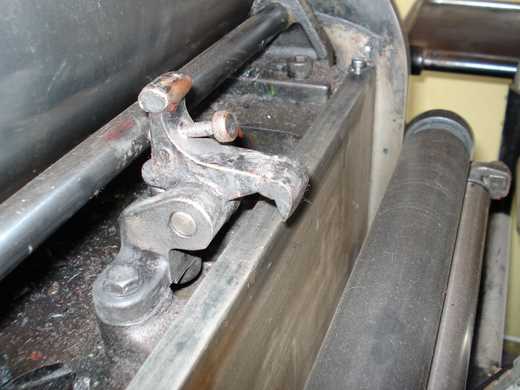
This is the old motor, with the large band that wraps around a large wheel. When the wheel spins, everything is in motion and the press is usable. Only electricity to get the motor going is needed, not for the actual press – which means you can run the press without a motor. Not a great idea, as the vacuum wouldn’t work and pressure probably wouldn’t be an easy thing to work with.
The two large discs on either side of the band come off and will be applied to the new motor. A dial on the front of the press controls the speed by moving the motor back and forth, loosening and tightening the belt. You can see that it’s about in the middle here.
Clearly I didn’t get to the discs to give them a clean.
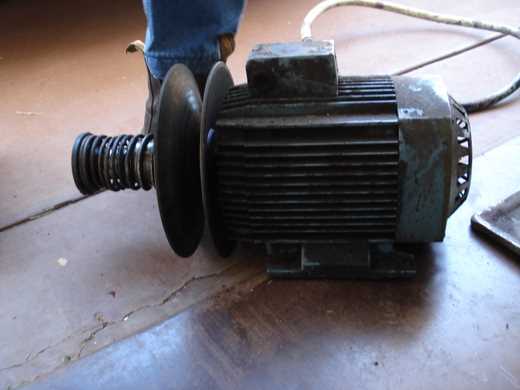
The old motor and discs. The spring on the left of the shaft push the two discs together, to ensure they are always tight on both sides of the belt so the belt doesn’t vibrate back and forth too severely.
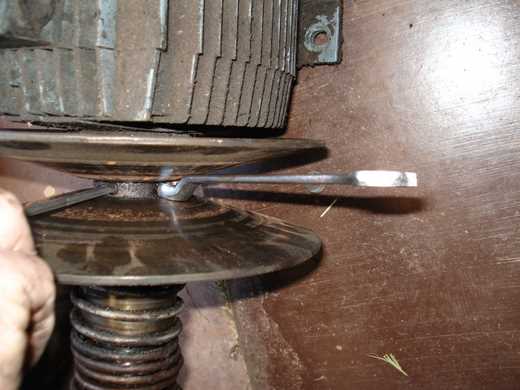
The problem with the spring is that it closes the discs closed when a belt isn’t present, making it harder to get to a pair of screws that needed to be undone to slip the disc, spring and shaft off the old motor. Nothing a little prying didn’t fix.
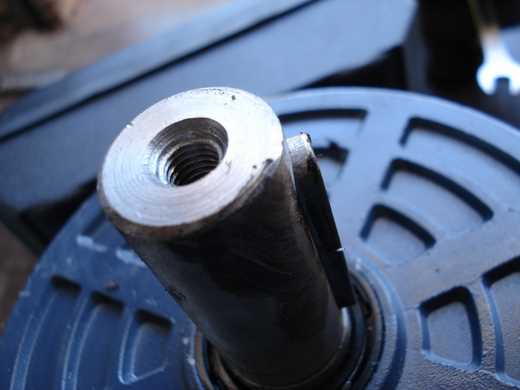
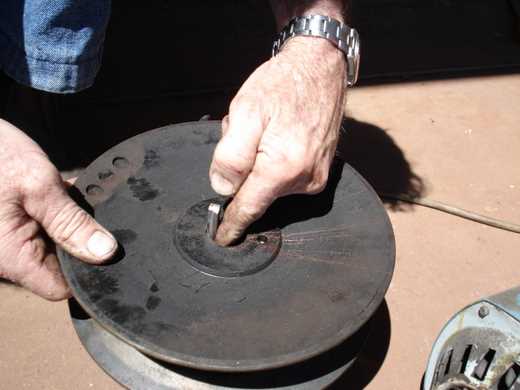
This is the shaft of the new motor, which the discs will slide down onto. You can see a key on the right, which slides into the shaft on the discs, shown below. A problem was hit.

The size of the shaft on the new motor was based on that of a motor powering another windmill. As luck would have it, it was a different size to this one. A few speculations were thrown around – those who built the motor rounded down, the original motor was built too big, so opening above on the discs was ground wider to accommodate it or this or that or this. Either way, it needed to be fixed. At this point, my father-in-law took the motor away and wrapped a 0.5mm sheeting of metal around the shaft of the new motor so it would fit.
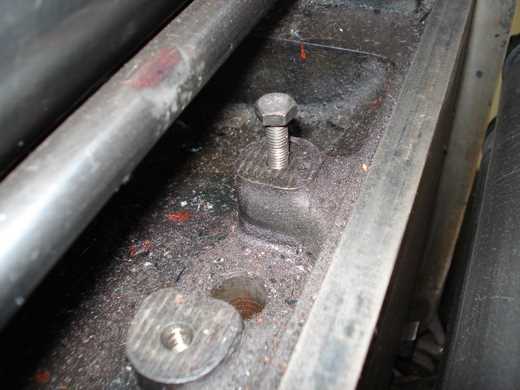
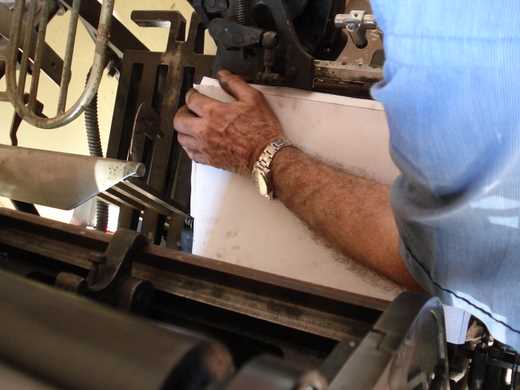
While he was away I thought it would be a good opportunity to install the hook that holds the chase (the frame which holds all the letters, spacing and blocks in place). Above is the two screws in which it is secured, the plate on the right where the chase is fitted and on the left is a inking roller.

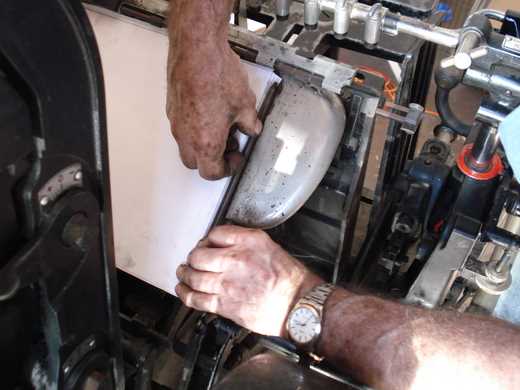
The hook.
The hook installed. I gave it a bit of a clean up to remove a lot of dried ink, but clearly more work needs to be done. I’m not sure how I’m going to get below the ink rollers to clean up, short of pulling them all off.

The next sizing problem – the key didn’t quite fit. It was removed so it could be shaved down. The bottom half had to stay the same width, so it could fit in the new motors shaft, while the top half has to be shaved down to fit into the discs shaft.

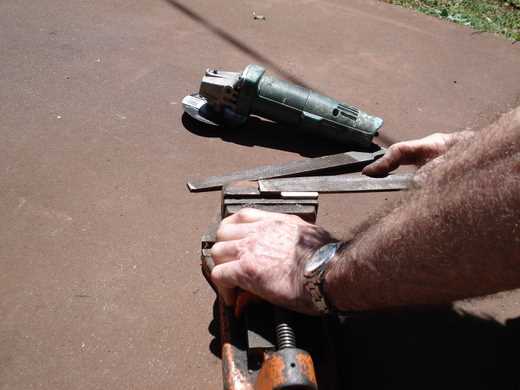

On the right is the original key, the new on the left. The bottom of the key had to remain the same width, where as the top of it has to be the size of the original key, to take its place.

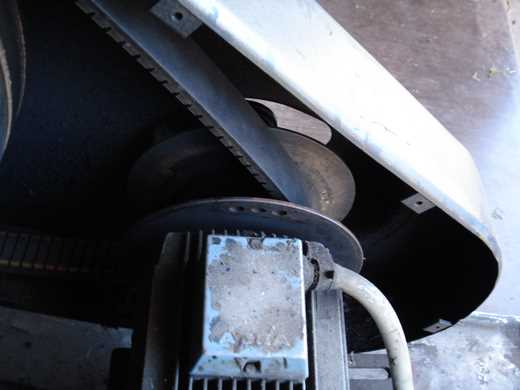
The new motor being put into place.
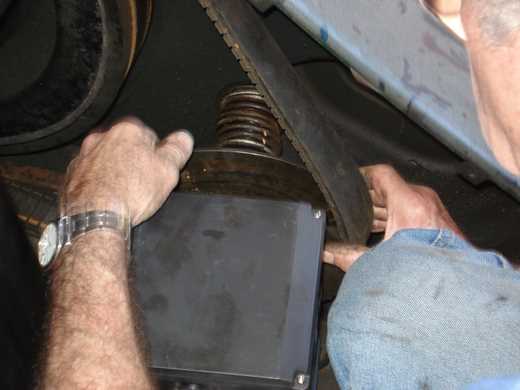
The belt being put between the discs.

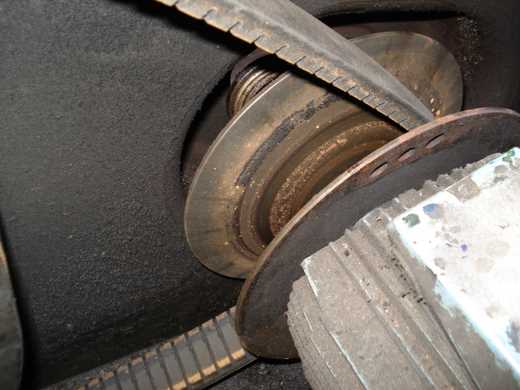
The new motor in and spinning! At the point I was told that the shaft on the motor still isn’t quite what it should be. It isn’t too bad and could go a lifetime without causing any issue. Or something might go wrong tomorrow. So for the afternoon, we left it as it was, but the motor now has to be removed and the shaft fixed. Wouldn’t want to risk wrecking my new baby!
Acting the Student

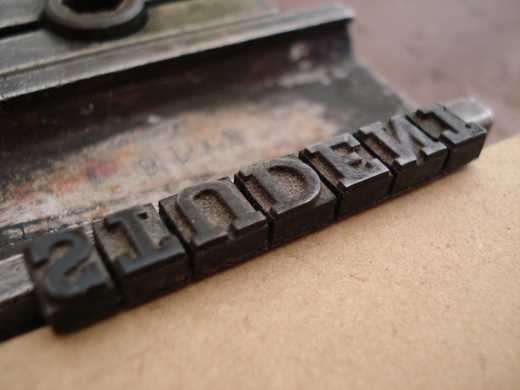
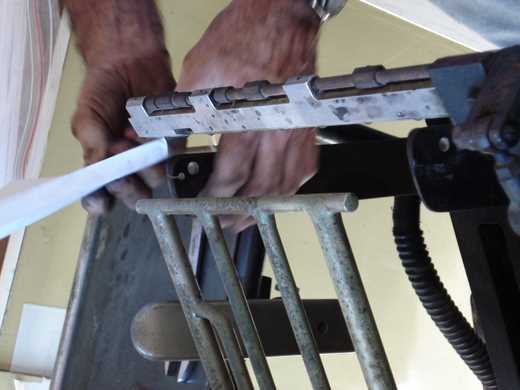
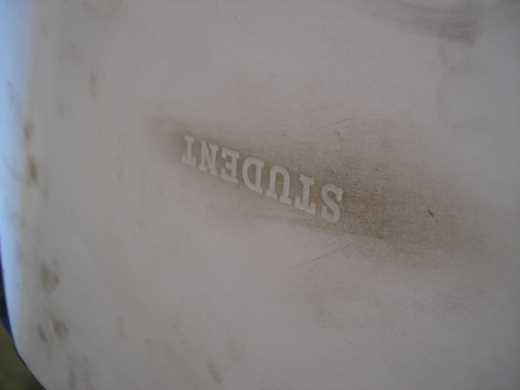
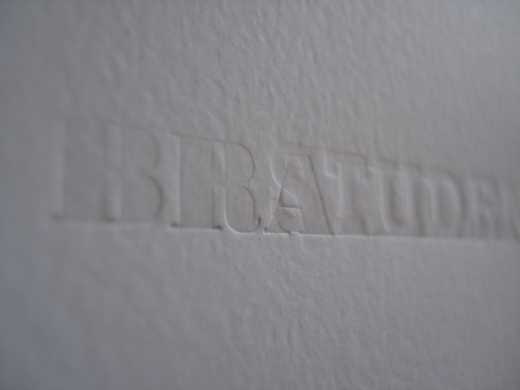
As mentioned earlier, I don’t have any type other than a box of random lines of type that we found. I had a hunt around and in the box of the names of local schools, I found something that seemed appropriate. Student. It just seemed fitting as I’m learning so much and have a long way to go. Above you can see it in the chase, as well as a large piece of wood (at the bottom) and some pieces of furniture.
The piece in the middle with the split and ring in the middle is the quoin (pronounced ‘coin’). You have a key, which goes into the ring and when turned, the piece spreads apart. You turn it till it is nice and tight, ensuring all your type and furniture has been as tightly put in place as possible, so nothing comes falling out.
A close, upside down, shot.
Here we have the hook, which was installed earlier, holding the chase in place, with the platen on the right.
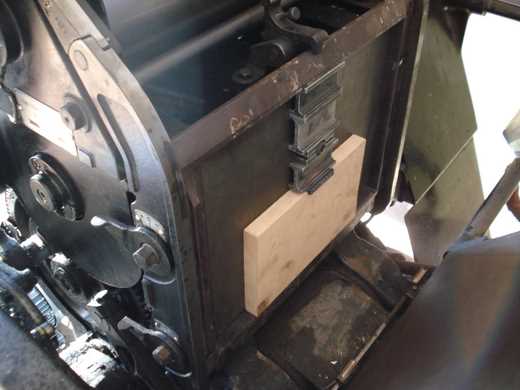
The platen (the large, flat surface) is where the paper is placed, or more accurately, dropped, to be impressed into the type on the left. If you look closely you can see two little bronze holders at the bottom of the chase (one is right at the bottom of the photo). This is where the paper is dropped. These two guides, as well as on out of the shot, serve as guides to make sure you get registration.
In the above shot, our platen is naked and needs some padding on which the paper will sit. Without the padding, you wouldn’t get a nice clean impression and are more likely to damage the platen and the type. Basically it needs a cushion of card and paper.
Traditionally you would use some manila card, but I didn’t have any on hand, so we used some heavy paper instead. To make sure you have consistency with pressures and settings, and to make sure nothing goes wrong, the padding can only be a certain height when combined with the stock your printing on.
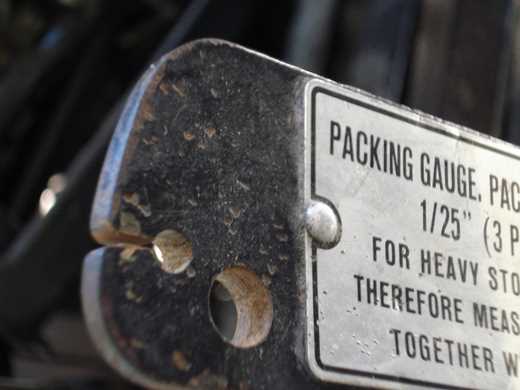
There is a gauge on one side of the press which helps you get the right height. You take your card and a few extra pieces of thin paper, as well as the stock you’ll be printing on and put them on top of one another and slide it into a slit. It needs to be tight, but not so tight that you have a bit of trouble getting it into the groove.

The packing goes against the platen, with the heavier stock cut to be bigger than the platen and scored, then folded, on three sides so it can fold around and be secured in place by round metal strips that serve as locks to keep everything in place. Normally it’s probably a best idea to do this with clean hands, so nothing gets onto the paper, but in this case it was more of a test to see how everything would go, so cleanliness wasn’t a trait we were concerned about employing.


This is a good shot because it illustrates how the paper is moved. At the top is a series of air filters that can be turned on and off using the handles at the top. When on, they suck air in, or more accurately, suck the paper up from the tray that is just below and can be seen in the background. The row of mini-vacuums moves down, sucks air in and picking up a sheet of paper, it then rises and is grabbed by the arm that you see in the middle of the picture. This arm then rotates and drops the stock into position to be pushed by the platen, seen at the bottom of the page, to be pressed into type and is picked up again and dropped off in the printed pile of paper on the other side of the press. Perhaps a video of all this would serve as a better illustration?
Remember how I said the packing sits on the platen to take the pressure, as not to dent the platen its self? Here is an example. A few things could have happened here; a piece of paper wasn’t picked up and an impression was made straight into the packaging, or I put the pressure on too tightly and it pressed on the paper so hard it went through to impress the backing. Or, the most likely, this is just a build up of being lightly hit over and over again.

My first letterpressed piece of paper. Obviously at this point you might have realised that I haven’t used any ink. I simply don’t have any at the moment. But this being letterpress and letterpress being the tactile beauty that it is, ink isn’t always needed.
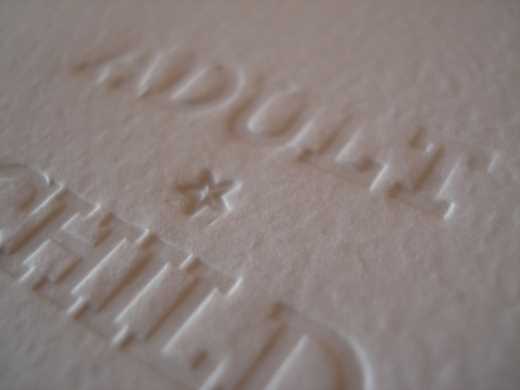
This is two words, in two different fonts, being hit onto the same piece of paper, just to see how it would look. Isn’t that R just beautiful? It looks as if there might be a little bit of ink on the bottom of this line of text, which you can see in the bottom serif on the main stem of the R and in the kick also.

Oh a star, a lovely star! What more could I ask for than a beautiful, delicate, lovely star? I was so happy when I found this. There is some sort of problem that I need to solve, which is evident in this shot. The pressure isn’t even across the type or platen. If you look closely, the bottom of child is a deeper impression than the top of adult.
I have no real type. Nor do I have any of the equipment needed in which to explore the world of photopolymer plates. But I have enough type, furniture, paper, love and passion to learn how best to use my press. Or perhaps it would be more accurate to say I have enough of said equipment to learn how to shatter type, damage paper and bruise my bones. It’s going to be a great way to learn and I’ll continue to share the important moments of this journey being taken.
REFERENCES & LINKS
The Windmill in My Garage
An article I wrote in early August journaling how the the Winmill ended up in my garage.
Boxcar Press A great press shop in New York that has a great site you can get lost in easily. Including a nice little page (and a good shot) of the Heidelberg Windmill. The best find on the site? A scan of the manual which is proving to be invaluable.
Creative Curio
Lauren Marie of Creative Curio has been doing up her own press lately and has done a great job of documenting it.
Brooklyn Bookbinder
Some stunning work can be found here, as well as a great blog by Maggie Campbell, who has recently gone freelance and is sure to go very far.
Don Black Linecasting
A great video and discussion about the Heidelberg Windmill Platen, which shows the machine in action and gives a nice background on it. Red balls, black balls, it’s all beautiful!
Briar Press
A community for those who love letterpress in all its forms.
British Letterpress
Good site with a fair bit of knowledge.
Master Your Craft.
Weekly.
Become the designer you want to be.
Join a group of talented, creative, and hungry designers,
all gaining the insight that is helping them make
the best work of their lives.